Docs / Organizations
Authentication
Overview
This documentation provides an overview of how authentication work within our product and how it can be configured through the organization.
Key Concepts
Users
Users within the product are considered a first-class citizen entity. They exist outside of organizations but can join them (by invitation) or create them if permitted. However, an organization may enforce specific authentication requirements for connecting to the organization.
Multi Factor Authentication
Currently, Cycloid supports multi-factor authentication through:
SSO (external)
Password + Email (builtin)
The Password + Email (Magic Link) authentication allows a user who logs in with a username/password to receive an email containing a login link. This ensures that the organization can verify the user has access to their email, thereby enhancing account security.
This feature is activated at the user profile level in the Password and authentication, where the user configures MFA via email.
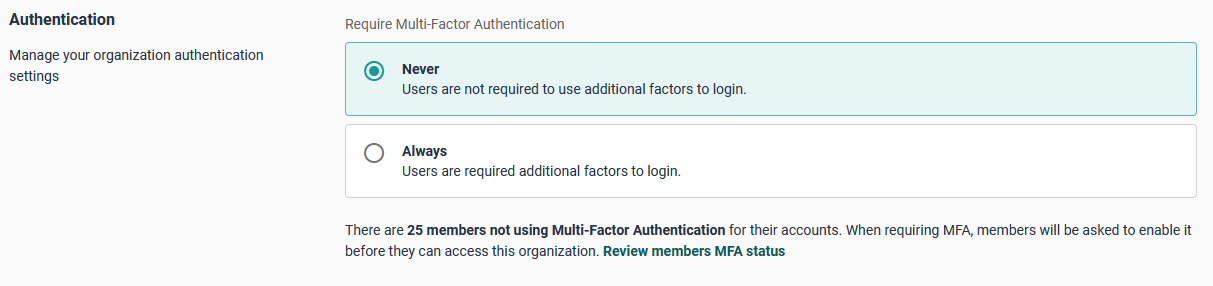
From the organization's perspective, the administrator has visibility into members who have not yet activated MFA and can require all members of the organization to activate MFA to be able to log in to the organization.
Scopes
Supported scopes:
Scope | Description |
|---|---|
openid | Required scope that must be included in all authentication requests to obtain a valid access token and enable OpenID Connect authentication flow. |
profile | Grants access to the user's standard profile information, including but not limited to name, preferred username, profile picture, and other publicly available user attributes. |
Grants access to the user's primary email address and email verification status, enabling applications to retrieve and utilize the user's contact information. |
Dedicated authentication
Single sign-on (SSO) for your domain within Cycloid allows your Users to easily and securely log in to their accounts.
What are Identity providers
Identity providers (or SSO) are a way to authenticate and log in to an application with just one set of credentials, rather than having to set up multiple usernames and passwords across different platforms.
Cycloid is currently only compatible with the OAuth 2.0 protocol. See the section below for the list of supported providers.
Setting up your Identity Provider
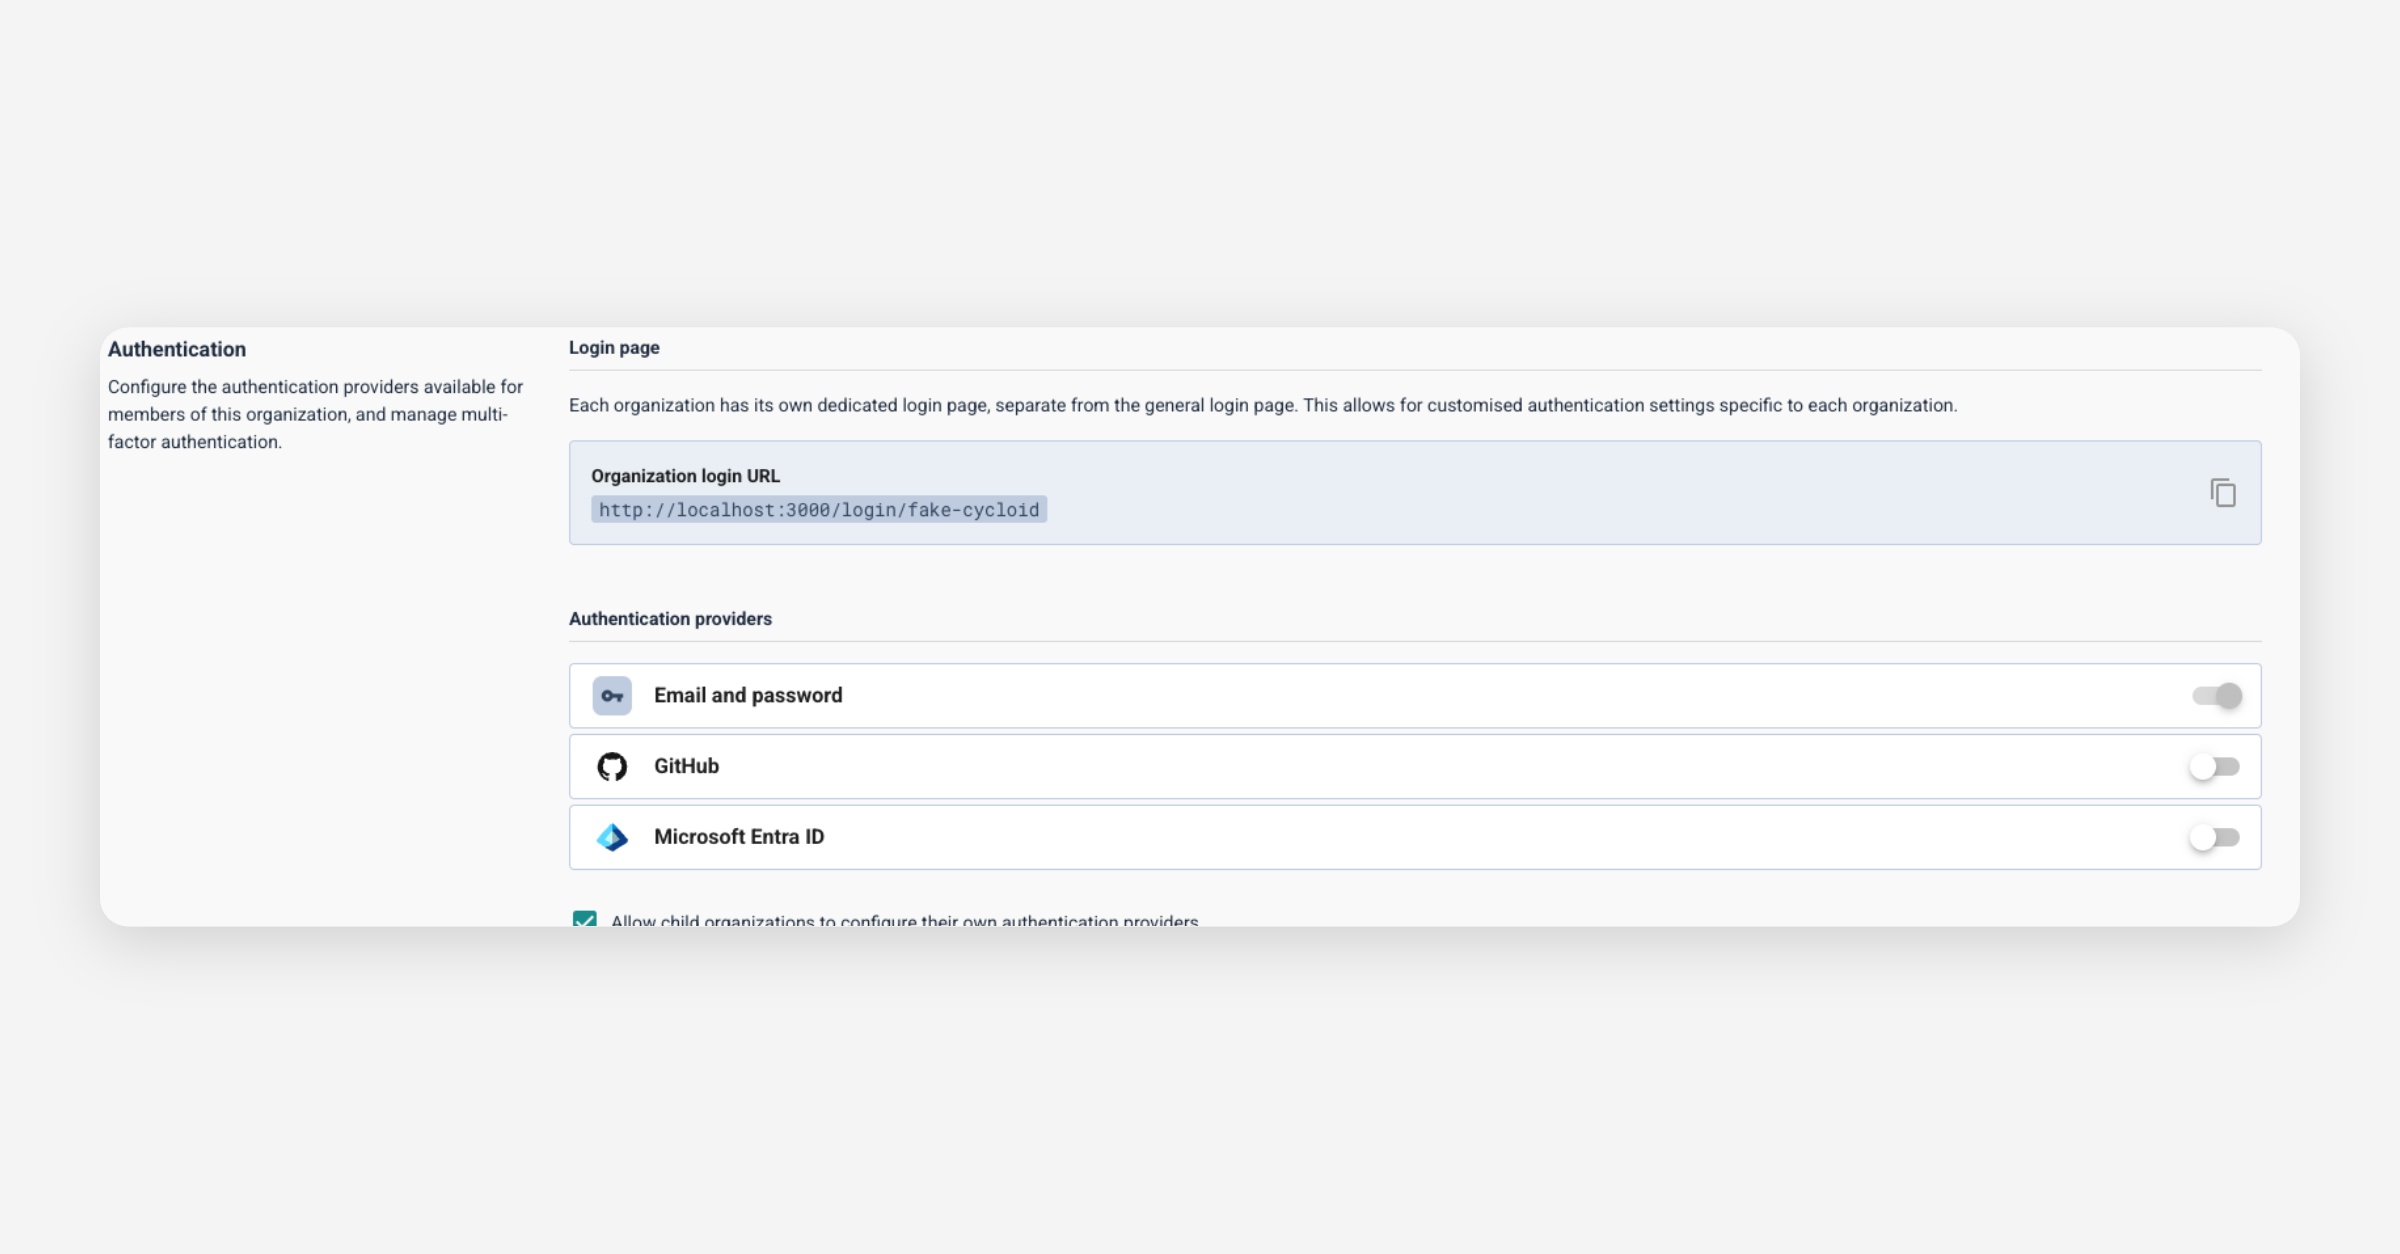
Organizations are able to configure their own SSO providers, the organizations members have some different options available (One of the options have to be activated.):
Email + Password
Email + Password and OAuth providers
OAuth providers
By default the only option available is Email + Password, is mandatory to have at least one authentication method enabled.
When you have more than one option enabled, you can disable the Email + Password option and only leave the OAuth provider enabled.
warning
It is important to know that if you leave only the OAuth provider enabled with an incorrect SSO configuration, you will be locked out and will not be able to sign in/sign up in the affected organization.
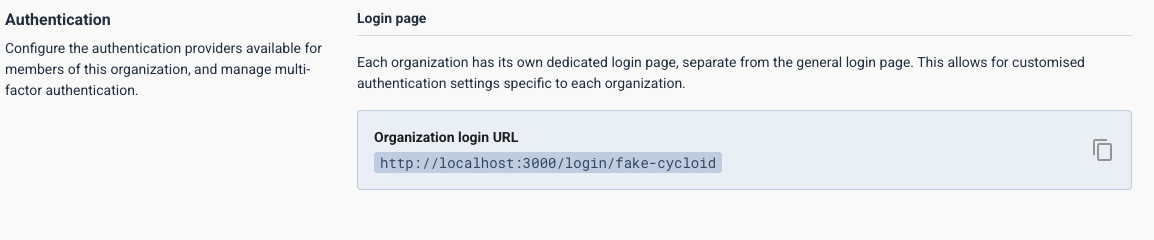
Organizations have their own custom page for login, this url is generated automatically.
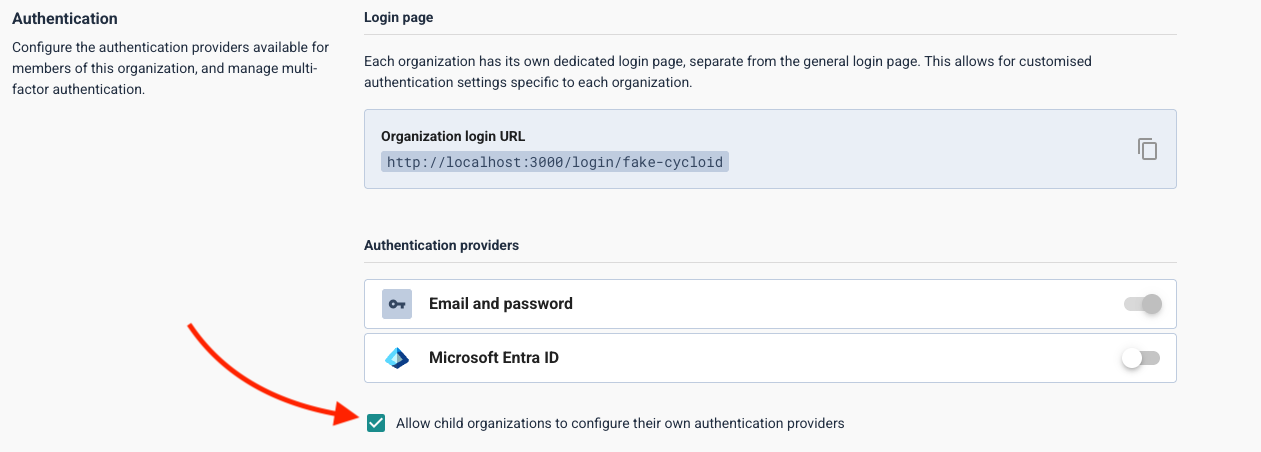
Parent organizations are able to allow child organizations to have their own auth providers configuration.
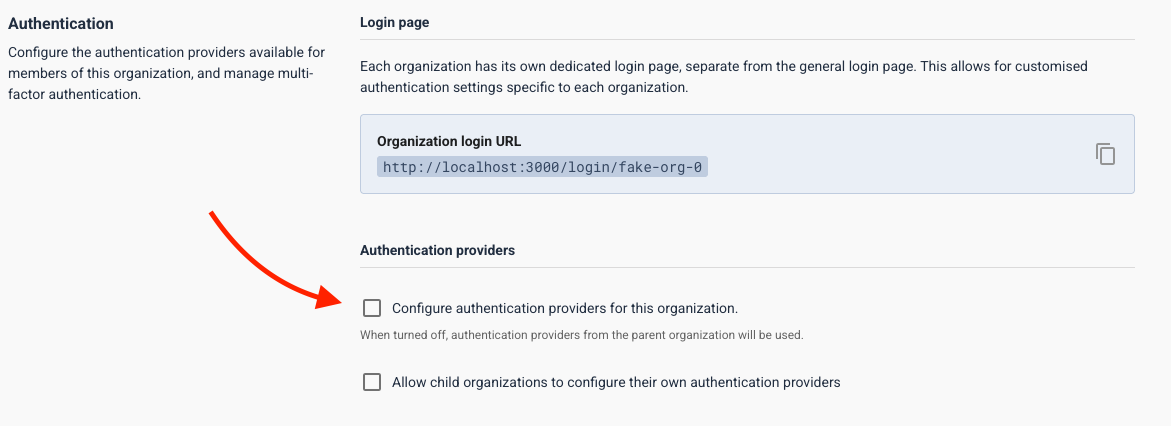
When parent organizations allow child's to configure their own authentication providers, child organizations have two options:
Inherits the configuration from the parent
Setup their own configuration
You can make this enabling/disabling the Configure authentication providers for this organization option.
EntradID/AzureAD
Configuring AzureAD, we can find it at Organizations Settings level in the Authentication > Authentication providers.
Required fields to configure are the following:
Attribute | Type | Required |
|---|---|---|
azuread-tenant-id | string | yes |
azuread-client-id | string | yes |
Go to the Authentication section in the organization settings and click on the
Microsoft Entra IDtoggle.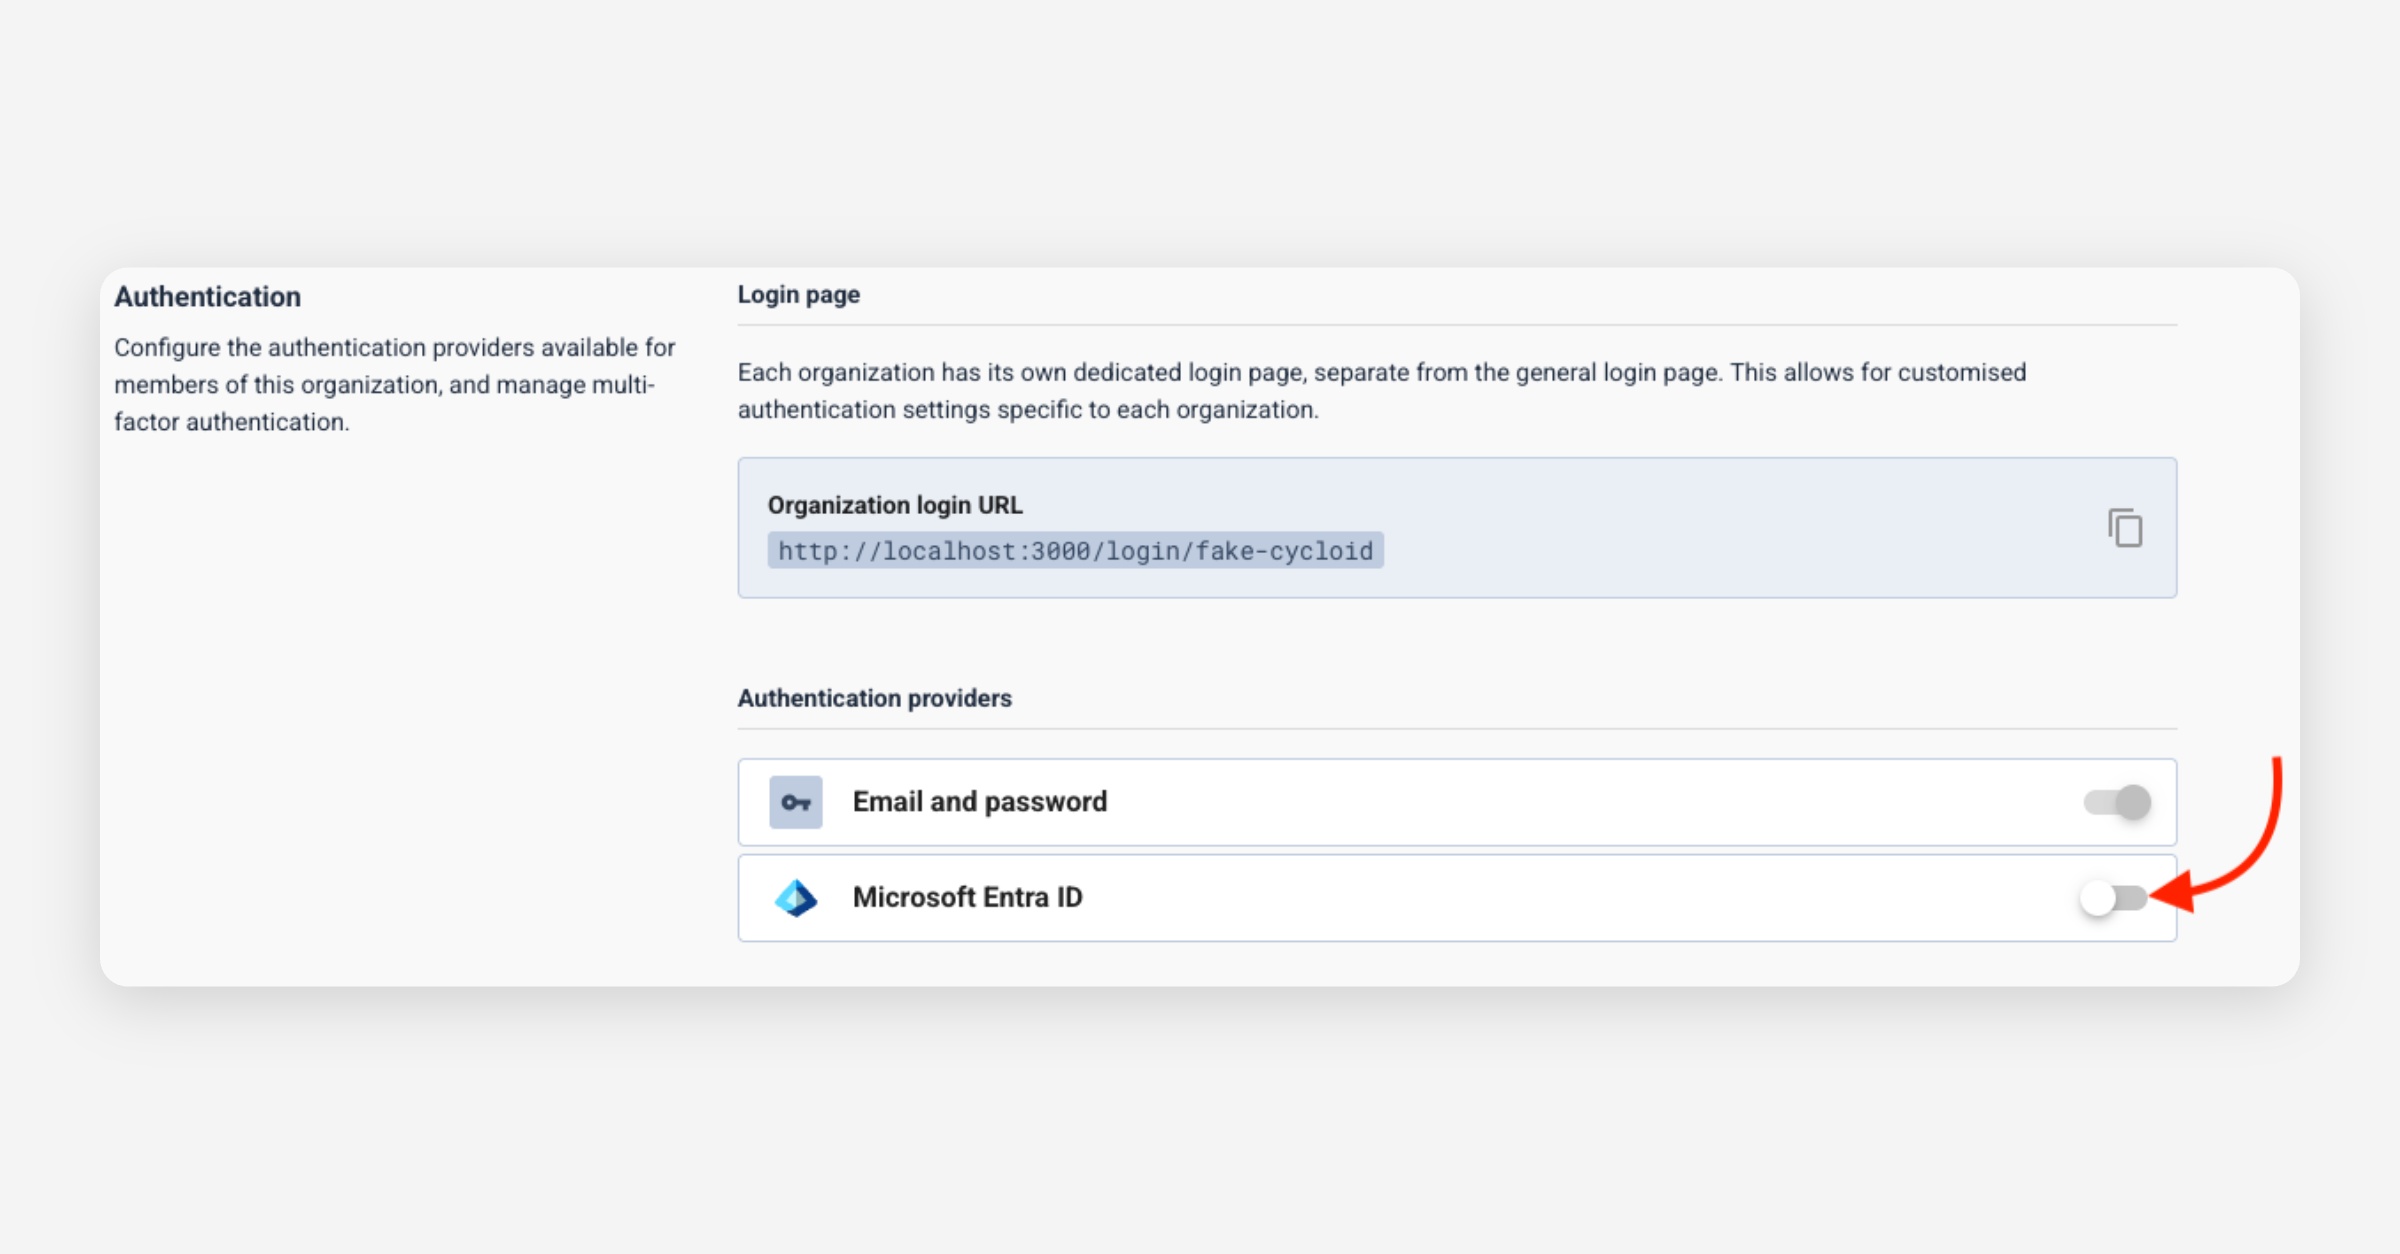
A panel will appear with the following fields:
Azuread Tenant IDAzuread Client ID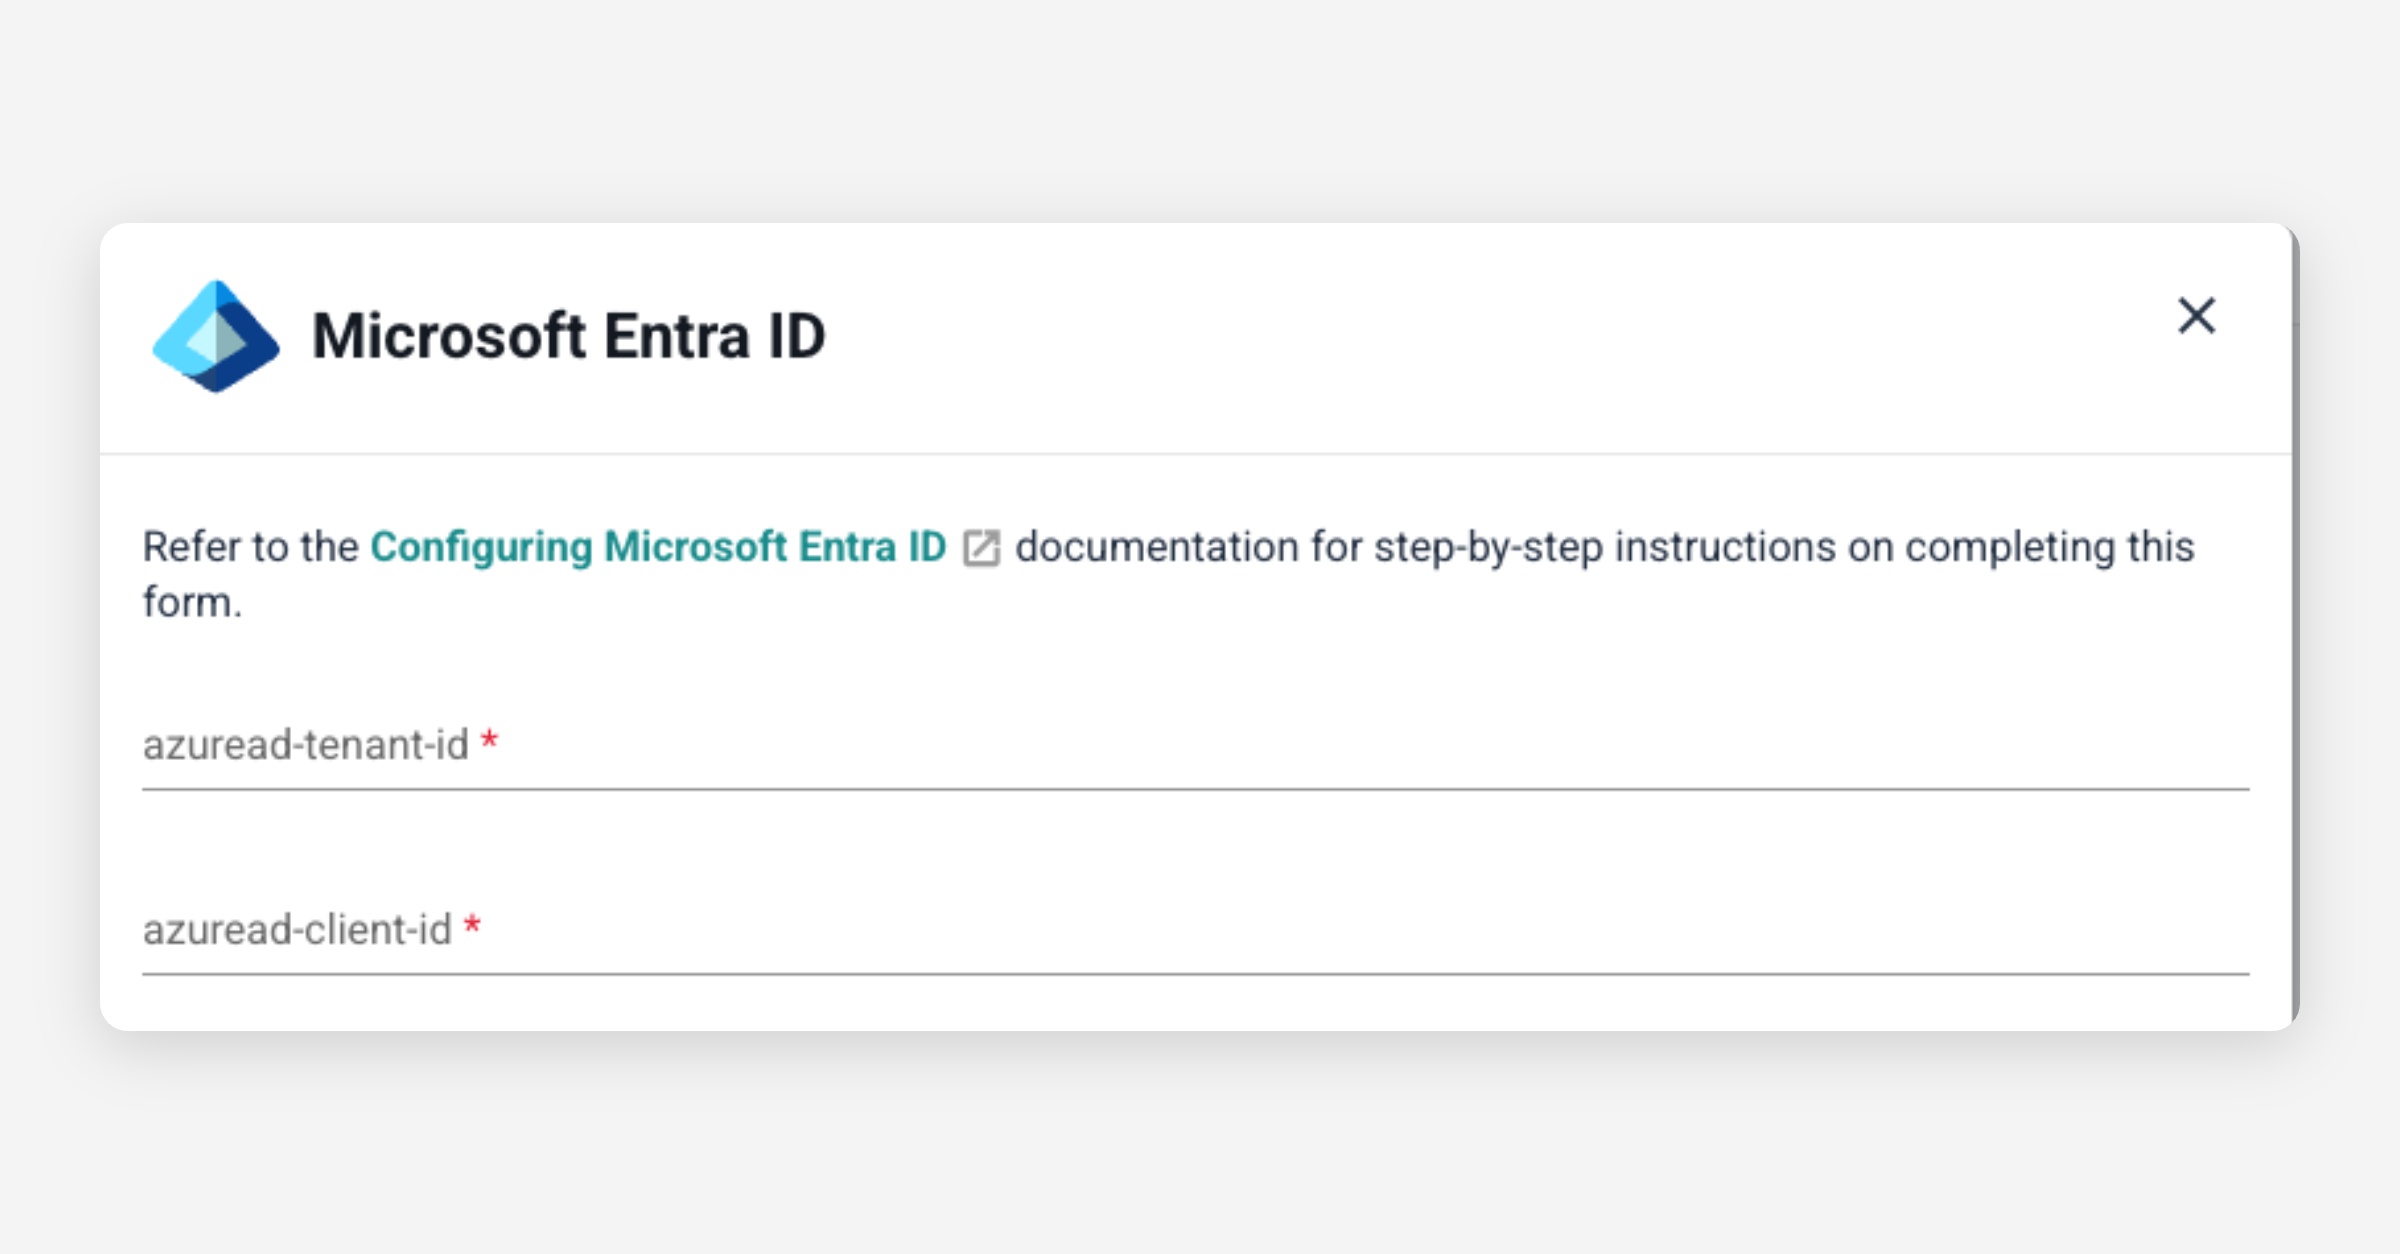
Set the values for the fields.
Click on the
Savebutton to save the changes and activate the authentication provider.
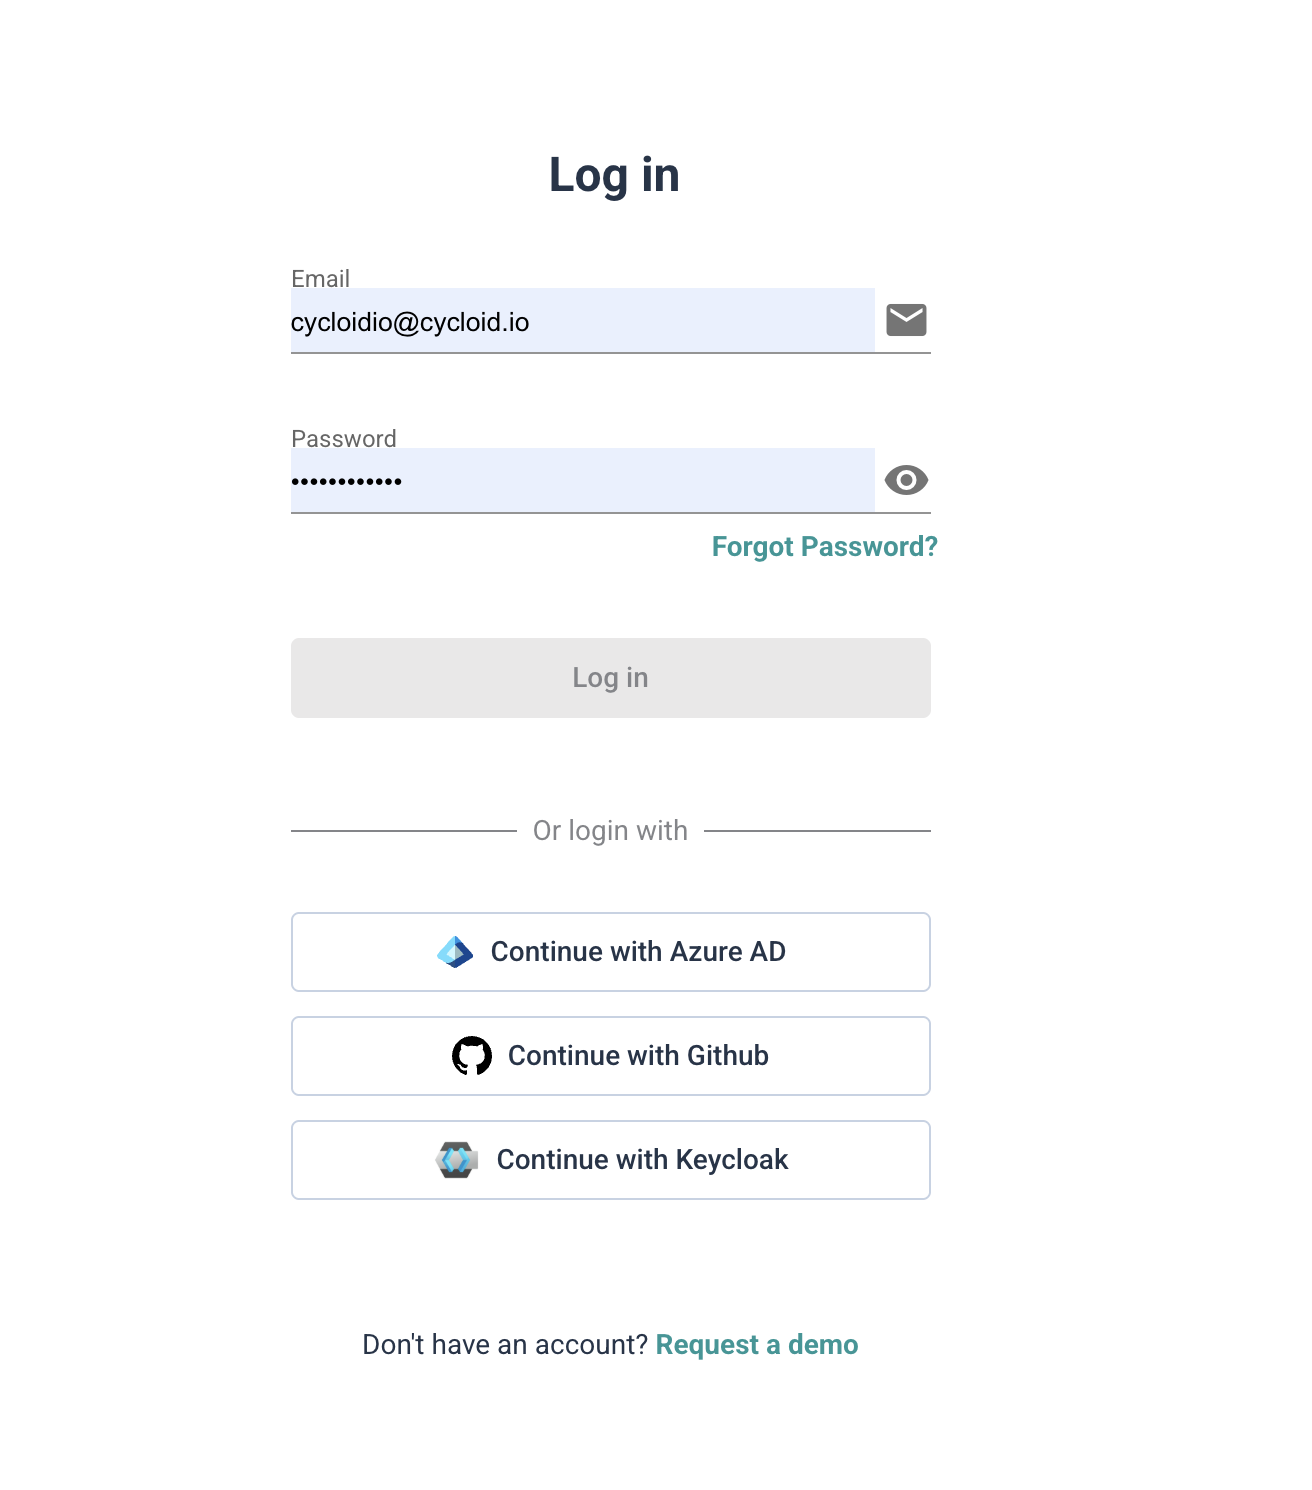
Finally you can go to your custom login page and see the new option to login with Azure.
EntradID configuration
On Azure Devops portal, enter the Entra ID configuration, then the App Registrations section
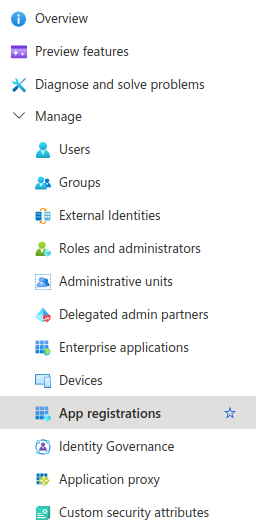
On the header menu, create a new registration

The application should be configured as follow
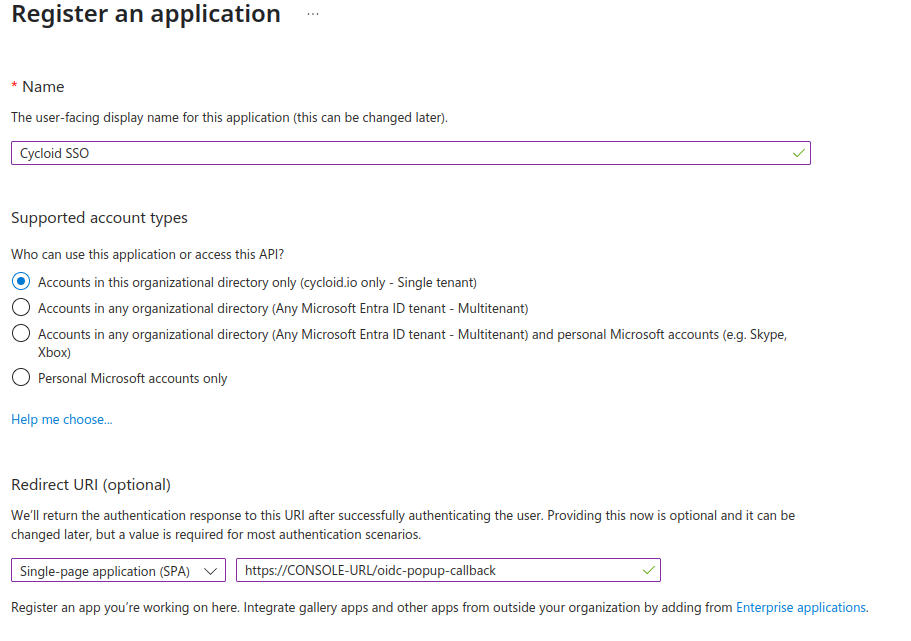
It's important to select SPA type for the redirect URL. If you have multiple environments, you can add later more redirect URI.
Azure Active Directory B2C
If using Azure Active Directory B2C, sign-up and sign-in user flow need to be created.
Here is the list of claims and attributes that need to be exposed for Cycloid.
Azure AD fields | Cycloid fields |
|---|---|
User's Object ID | ID |
Display Name or Given Name | GivenName |
Surname | FamilyName |
Display Name | Canonical |
Email Addresses |
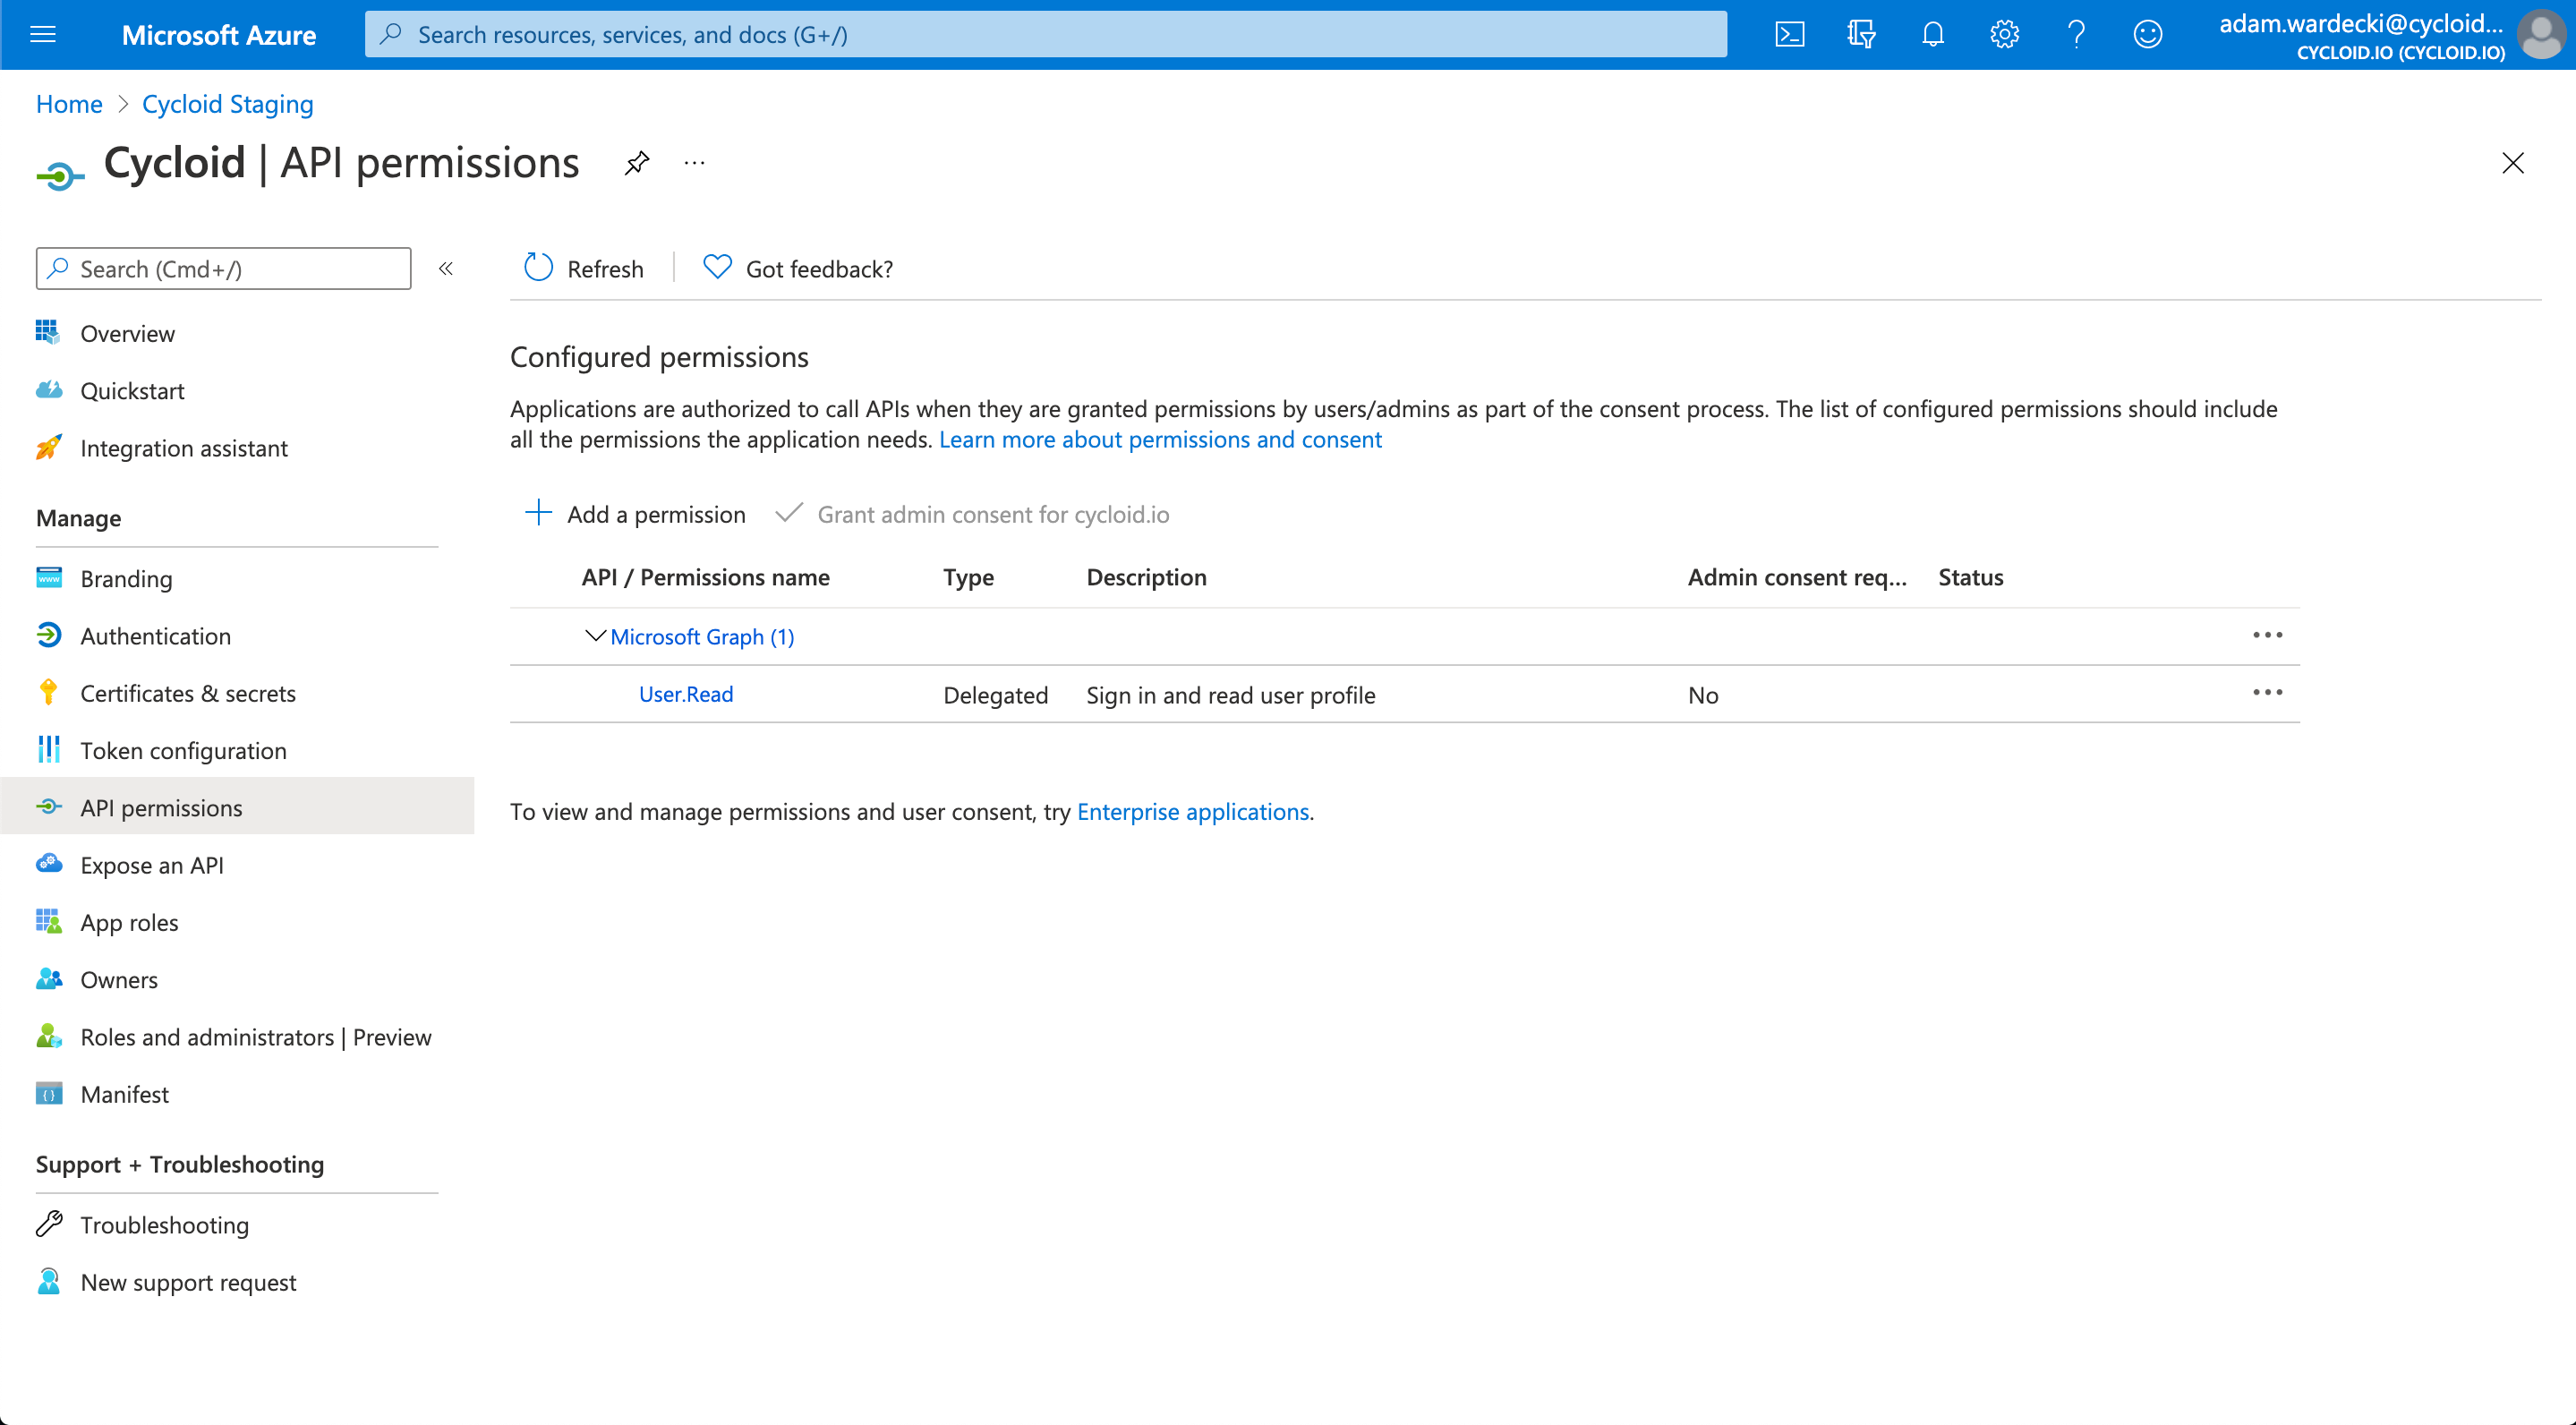
Navigate to the API Permissions and ensure that the app has permissions for signing in and reading user profiles. If these permissions are missing, click + to add them (as shown in the screenshot below).
GitHub
To configure GitHub as an authentication provider, navigate to the Organization Settings and under Authentication > Authentication Providers.
The following fields are required:
Attribute | Type | Required |
|---|---|---|
| string | Yes |
| string | Yes |
| string | No |
info
When registering the application on GitHub, the callback URL must follow the format:
<console_url>/oidc-popup-callback
Configuration Steps:
In the Authentication section of the organization settings, enable the GitHub provider by toggling the corresponding switch.
A configuration panel will appear with the following fields:
GitHub Client ID
GitHub Client Secret

Enter the required values.
Click Save to apply the configuration and activate GitHub as an authentication provider.

The Login with GitHub option will now be available on your custom login page.
OIDC Custom provider
To configure OIDC as an authentication provider, navigate to the Organization Settings and under Authentication > Authentication Providers.
Attribute | Type | Required | Description |
|---|---|---|---|
| string | No | The custom name displayed on the SSO login button. Helps users identify which provider they're signing in with. |
| URL | No | URL to an icon image displayed on the SSO login button. Provides visual branding for the authentication provider. |
| string | Yes | The OIDC provider's issuer URL (e.g., |
| string | Yes | The client ID provided by your OIDC provider when you register your application. Uniquely identifies your application to the provider. |
| string | Yes | The client secret provided by your OIDC provider. Used to securely authenticate your application when exchanging authorization codes for tokens. |
| string | No | The client secret JWT provided by your OIDC provider. Used to securely authenticate your application when exchanging authorization codes for tokens. |
info
When registering the application on OIDC, the callback URL must follow the format:
<console_url>/oidc-popup-callbackExample:
https://console.cycloid.io/oidc-popup-callback
Configuration Steps:
In the Authentication section of the organization settings, enable the OIDC provider by toggling the corresponding switch.

A configuration panel will appear with the following fields:
Display Name
Icon
Issuer
Client ID
Client Secret
Client Secret JWT
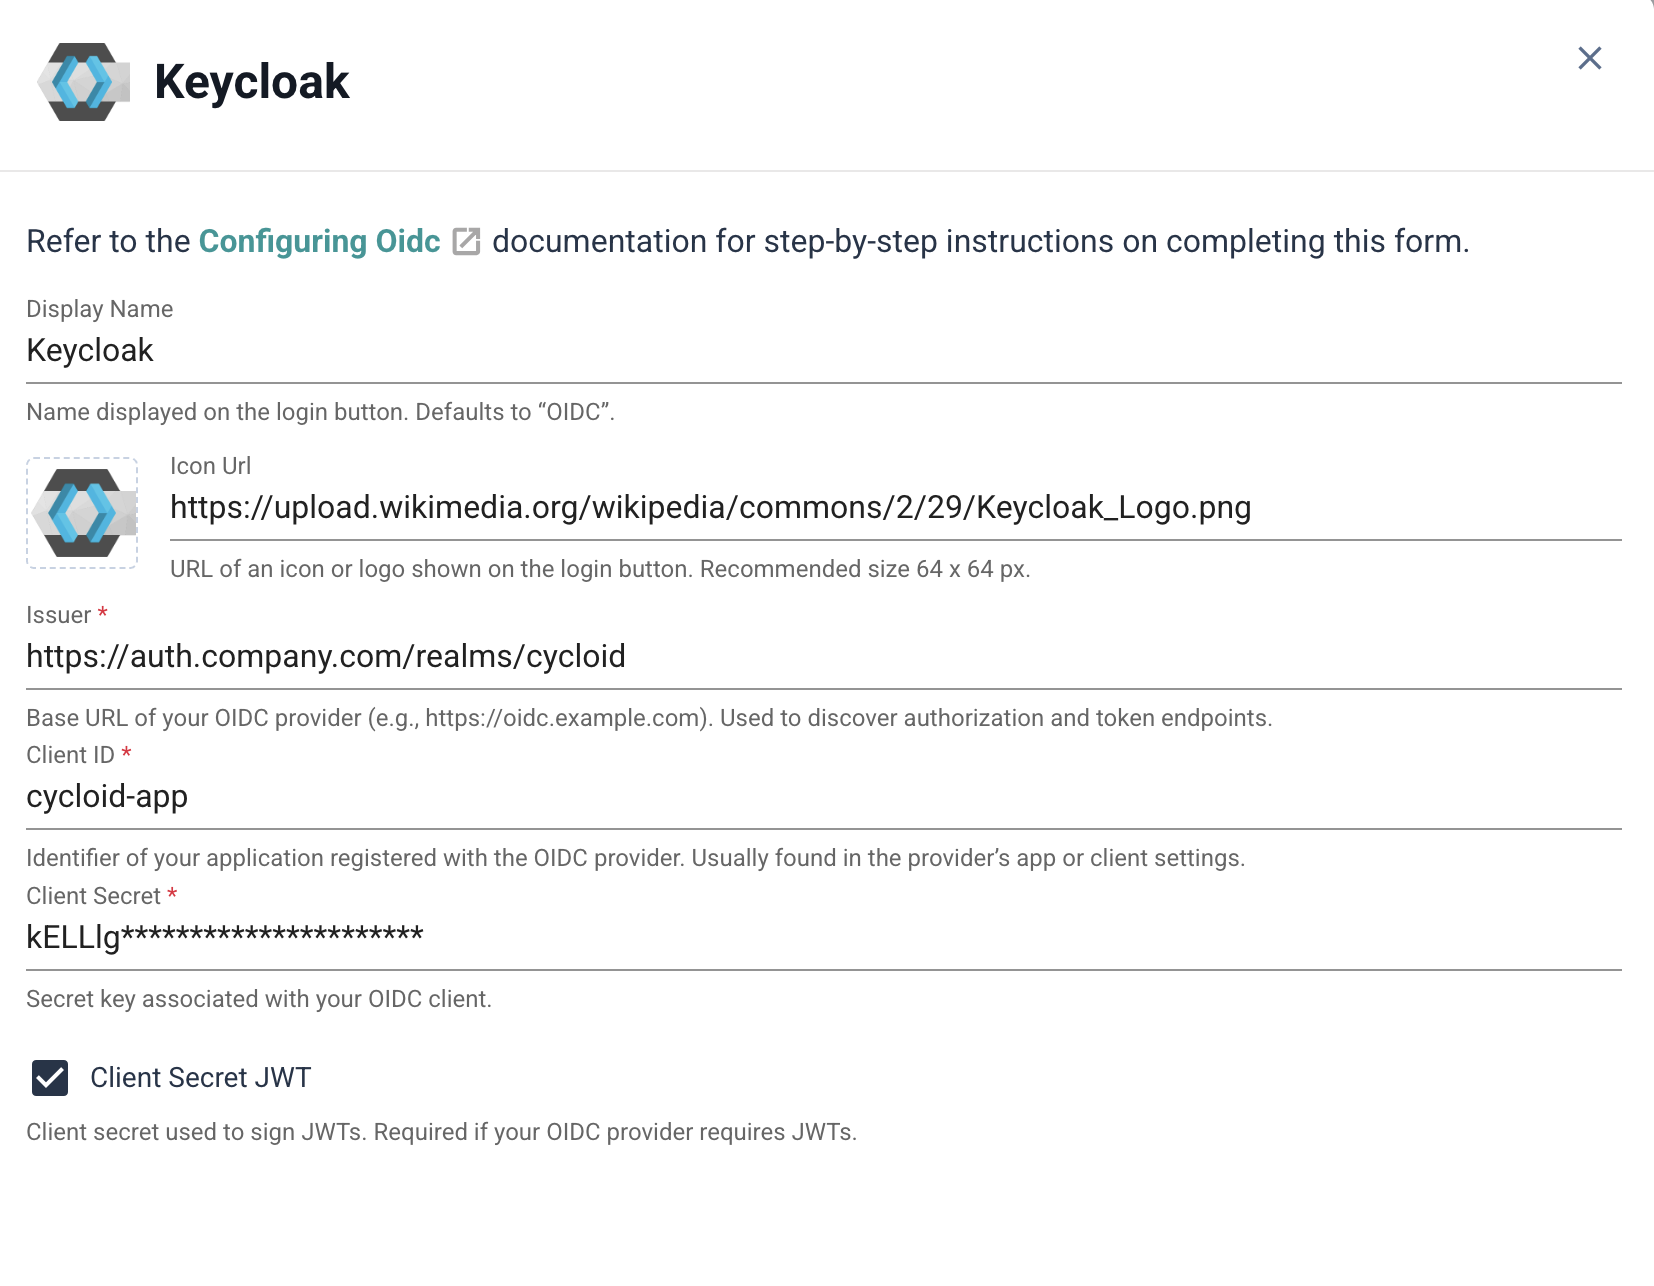
Enter the required values.
Click Save to apply the configuration and activate OIDC as an authentication provider.

The Login with OIDC option will now be available on your custom login page.
To customize the OIDC provider, set the Display Name and Icon Url. These values appear on the SSO button, helping users identify the provider they’re signing in with.
Was this helpful?